Showing posts with label Classroom Tree. Show all posts

The Apple Tree and the Fall Tree

Here is how our Classroom Tree looked in its recent Apple Tree form:


And here is how it looks today:


I kind of wish I had more fall leaves to put on it, but that certainly doesn't mean that I'm going to run off and make some more.  Maybe I'll add to it next year. 


The next step is the easiest - just take all the leaves off for winter. 

Read more...

The Leaves are Almost Ready!

Well, the fall leaves are almost ready to put on the Classroom Tree. Right now there are apples on it, but since we've been talking about fall a lot (and now that we can actually see signs of fall), it's time for the tree to transform.  Overnight.  Magically.


As you can see below, I have made tucks in all of the leaves to get them ready.  My plan is to layer them in groups of two or three and then run them through the sewing machine again.  However, I worry that doing that will dramatically lesson the length of  leaves I will have to  string on the branches - by about one-half to two-thirds, of course. 


Well, we shall see.  I might do that (layer them) anyway just to cover up the harshness of the bright yellow, which looks a little glaring to me even as I write this.


After I get them all strung (layered or not layered) I will post another picture.

Read more...

The Classroom Tree

The tree is back up in my classroom, with a new and improved look.  I had to pull last year's tree down at the end of the year, but enjoyed it in the room so much that I wanted to put up another one this year.  Fortunately, I learned several things last year that I wanted to improve on,  which helped me improve on the tree design a bit. 

One thing I learned last year was the need to secure the tree "hole" better so that it didn't dip down into the trunk.  The hole is made from a flower pot secured to a big piece of folded cardboard.  Here's how it looks on the underneath all that paper:


This year I tied a piece of string on the back/bottom of the flower pot and secured it to the "roof" of cardboard above.  This hopefully will keep it from falling down in the trunk).

My friend Gay was unable to help me tree-build, but Jacob came along to help.  And the teacher from the morning class was there that day, as well.  The only problem was that I really didn't know how to tell them to help until I fumbled through the process by  myself.  And by the time I figured out how to do each part, each part was already done. 

I admit that I did despair a little bit during the building process, for a long moment losing hope that I had any tree-making ability in my at all.  I believe that was the stage where I was trying to hold up three or four random tree branches over my head that were splayed out like unconscious octopus legs while trying to attach them to the wall.  But then I pulled it together.  Whew.

I did do something different for the leaves this year.  Last year I just made leaves out of butcher paper, and then we added hand print leaves and other things as the year went on, as you can see here:


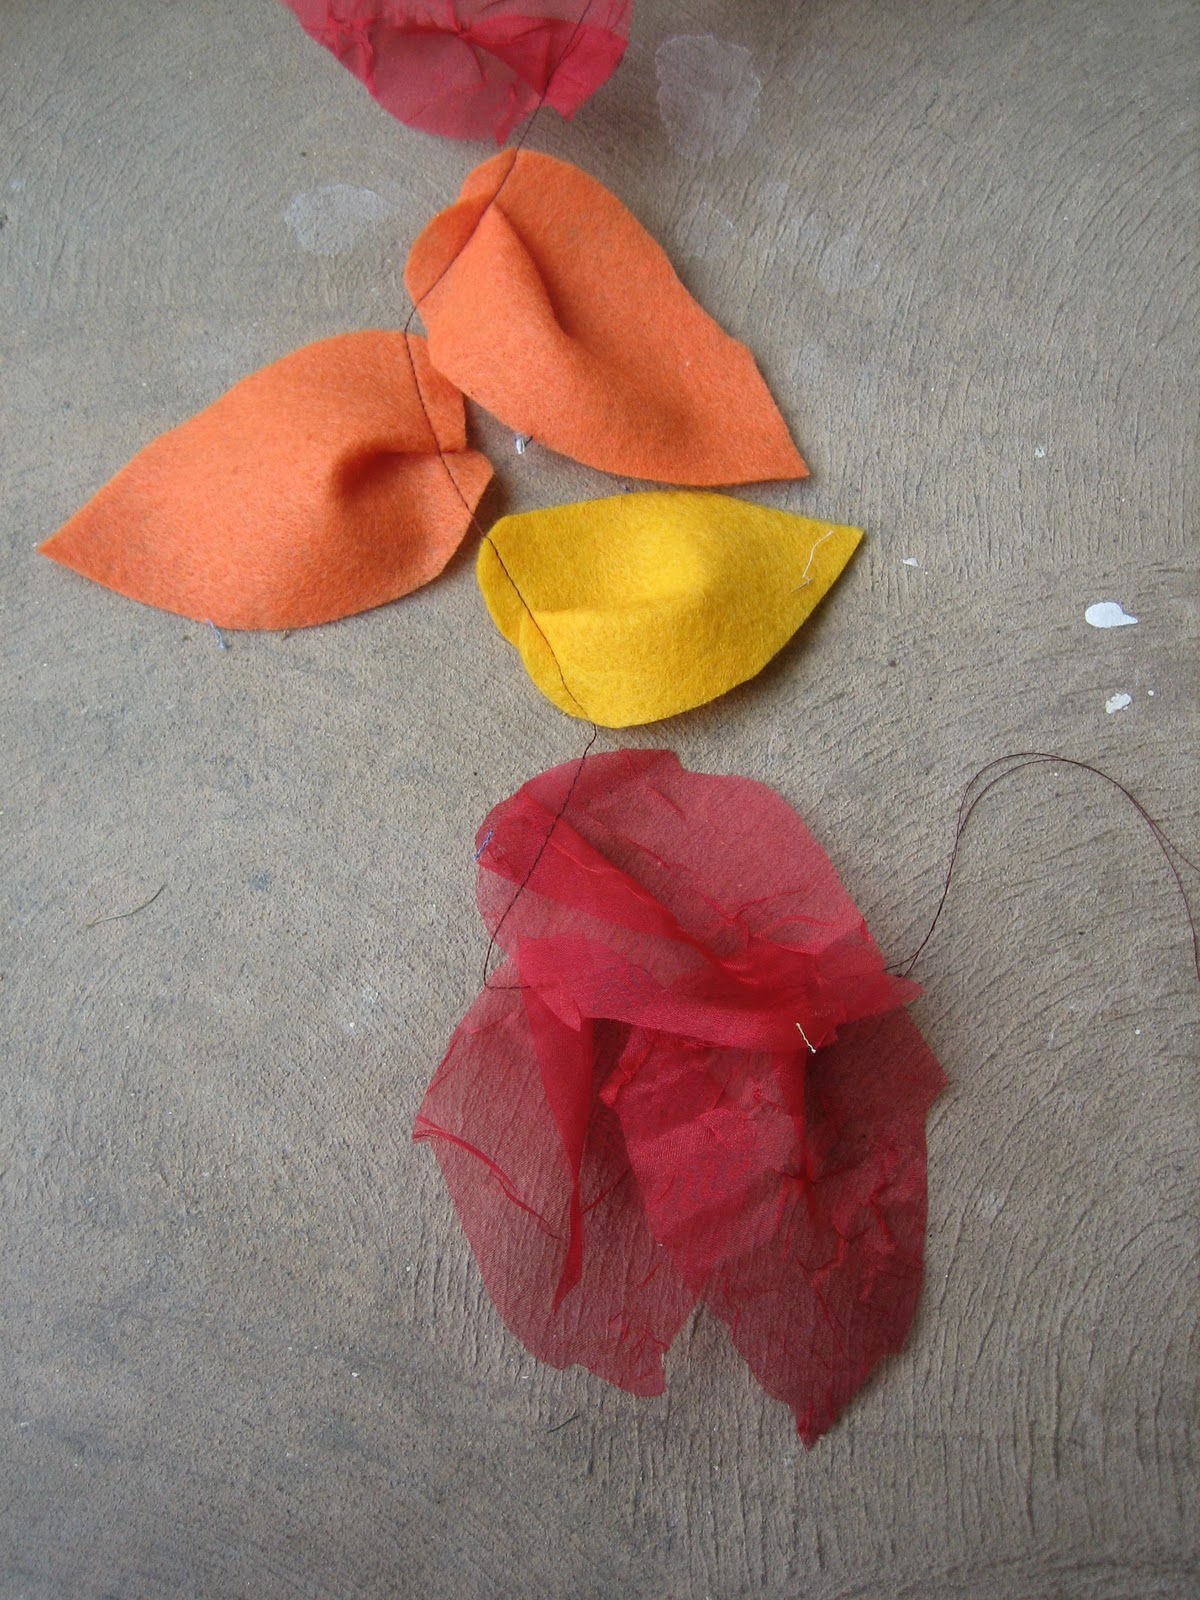
This year I bought some shiny, sparkly fabric and decided to make fabric leaves:


My original thought was that I would use the die cut machine at the Teacher Center to cut them all out, but this proved to by way too time-consuming, since you could only cut out two leaves at a time without the die cut machine making strange cracking sounds.  (And believe me, that ladies that work there frown on that.)

So instead I brought them home and cut leaf shapes out with scissors, since I could layer them and cut them  seven or eight at a time.  I then decided they needed a little shaping, so I ran each leaf through my sewing machine to put a little tuck in the top of each one.  After that, I layered the leaves into groups of three and ran them through the machine again without cutting the thread, resulting in long chains of leaves.  (Yes, I know.  I am a glutton for huge, time consuming tasks like this.)  Then I could attach them to the tree in long pieces, giving the tree more leaf coverage:


Finally, I added some animals to the tree.  Right now I have a raccoon, a couple of birds, and this monkey.

So that is Phase One of the tree this year.  Phase Two will be to add apples, and then we'll move on to Fall Leaves (Phase Three).  You might have noticed that I bought fabric for fall-colored leaves as well, but I will need some more time before I have the energy to even consider taking on that sewing task again.   

The good news in that category is that leaves here don't even begin to change until around November, so there's plenty of time to rest up for Phase Three...and beyond.

Read more...

Fall Tree

Wow, a whole week has gone by since my last post.  I suppose I've been off chasing bits of fluff in the sky, hoping they were attached to friendly spiders...

Here is the classroom tree with its fall attire.  Never mind that it has several different types of leaves on it.  We just like it because it's pretty.


Read more...

The Classroom Tree, Phase Two

 You can find ‘Making a Classroom Tree” here  and here, and “Decorating a Classroom Tree” here and here.


Here is the classroom tree with its apple look.  It miraculously grew fully-ripe apples just this week!  Actually, that's not true.  The morning class put up their cut-out apples several weeks ago.  We just got our crumpled up paper apples up  a few days ago  (shown a little better below). 

Which is a good thing, since next week the green leaves are (again miraculously) turn fall colors overnight. 

Amazing, this fall weather.

Read more...

The Classroom Tree


You can find ‘Making a Classroom Tree” here  and here, and “Decorating a Classroom Tree” here and here.


Today I want to show you my classroom tree.  When I was subbing last year I saw a tree and someone's room, and thought that a tree was a wonderful idea.  So, I asked the teacher who has a morning class if I could put up a tree in the room, and she was all over the idea.  Then I told my friend Gay (who taught preschool for many years) that I wanted to make a tree in my room, and she said, "Oh, I had a tree in my room, too."  Which automatically signed her up for my Official Tree Co-Builder. 

I wanted my tree to be as 3-D as possible, so I decided to start with a cardboard base that I could wrap up with the brown tree paper.  Fortunately, it was the week before school when we built it, and I found a whole dumpster full of discarded cardboard boxes behind Jericho's school.  We rummaged around in the dumpster for the perfect-shaped box (without Jericho, of course.  We didn't want to "humiliate" him before he even started his first day as a freshman".  We found a very long and skinny box, which we folded in half to look like this:


In the "crotch" of the fold I put an old flower pot for the hole.  Before I put the pot there I covered the inside of it with brown paper.  (Actually, I took a piece of brown paper and shaped it around the outside of the pot.  Then I pulled it off and glued it onto the inside. )

We then used three long pieces for brown butcher paper to "wrap" the tree.  We glued the pieces together at the bottom so it was like one big sheet, but we still basically tried to use one width for each of the three sides of the cardboard base.  We left the top part separate, so each could later be a main branch of the tree.  We then scrunched up the paper for the trunk, and hot glued it all over to the cardboard.  Then we scrunched up the three main branches and attached them either to the wall with staples, or the ceiling with yarn.  Finally, we added extra, smaller branches with staples, and leaves.

Last week the kids did their first "tree" project by making their hand prints for more leaves.  Everyone was happy with this except for one little one who seemed truly horrified by the idea of having his hands painted, and one whose favorite color is orange, and really wanted to make an orange leaf.  I told her to wait and month or two, and then she could make all the orange leaves she wanted.

Here is the current state of the tree now:


It will have apples in a few weeks, then fall leaves, then perhaps snowflakes later...we'll switch out animals soon, too.

Who knew a tree could be such fun?

Read more...

  © Blogger template Shush by Ourblogtemplates.com 2009

Back to TOP